
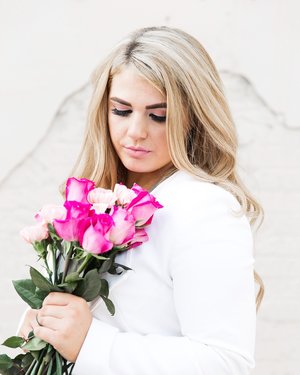

Hello!
I think we have all been there… You get photo’s back (whether it’s family photos, self portraits, engagements, wedding, etc) and you realize your make up may have been a little on the heavy side, or your spray tan looks streaky, or your lipstick makes you look washed out. I have had ALL of these moments before, and I want to share with you a few of my tips for getting my make-up to look good in photos. It has taken A LOT of trial and error. I still remember my very first photo shoot for my blog and I got the pictures back and I INSTANTLY regretted my spray tan the day before. I remember once getting photo’s back and in every single one I had the world’s worst breakout and didn’t take the time to cover it up before shooting. Like I said, I’ve had a lot of make-up trouble when getting photo work done and learning the hard way what NOT to do when it comes to getting ready for them.
1. Spray Tan With Caution
The first thing to keep in mind is more often than not, spray tans DO NOT photograph well. Let’s be honest, they barley look good in person, but on camera they always bring out the worst orange tones and I’ve had them totally ruin an entire photo-shoot before. I’ve worked with photographers who have given specific instructors NOT to do a spray tan up to three days before, and I couldn’t agree more. Sure, you can still do them, but make sure they’re done well, and that you don’t push it too close. I haven’t done spray tans for a while now, but I used to make sure I never did them more than three days before a shoot.
2. Be Careful With Your Foundation
Second tip is to be really picky about your foundation. If your foundation is too orangey, or doesn’t match your face, it will show up on camera and it’s hard to edit. I usually go for a lighter foundation when I do photo’s, just to play it safe.
3. Embrace The Highlight
Highlighters are your best friend when it comes to photo’s. I always apply extra concealer under my eyes and it helps a lot with camera lighting.
4. Choose Your Lipstick Wisely
Sometimes I would picture a photo-shoot in my head and I had the lipstick perfectly in mind, only to see later that it washed me out. I try to stay with colors that are more vivid and won’t wash you out too much.
5. Eye Make-Up: Less is More
Eye make-up was a hard lesson learned for me when it comes to photo’s. Call me crazy but I noticed that eye make-up always showed up SO vivid in photo’s (especially after I went blonde) and more often than not it looked like way too much make-up. Since then, I have stopped wearing so much eyeliner, and I opted out of eyeliner on my water line (or bottom lash line) and used concealer underneath with a light eye shadow to highlight under my eyes. It made SUCH a huge difference in how my eyes looked in photo’s. Eyeliner is not always your friend when it comes to photo’s! And if you are somebody that cannot possibly go without your eyeliner, than go for browns instead of blacks.
There you have it! All of my best tips for photo-ready make-up, hope this helps!
XOXO, MYKEL ELIZABETH